
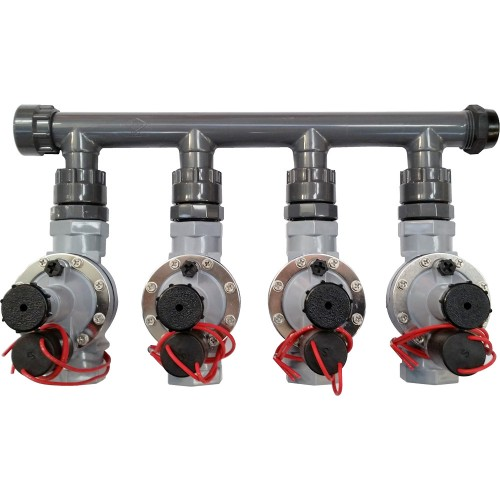
How To: Install a Threaded Irrigation Manifold
Once you have planned for how many zones your irrigation system will require, and you have built your tap connection, you will need to install an irrigation manifold. The role of the manifold is to distribute the water through each valve to each irrigation zone, which are automatically operated by the irrigation controller.
This How-To Guide is using Threaded Manifold Fittings which makes things easy because you can add, reposition and remove as you go. Just remember, as Threaded types & sealing methods can vary slightly across brands, we recommend you stick with the same branded fittings so you don’t get any leaks!
What You’ll Need
- Manifold Fittings (Tees, Elbows, Multi-Port depending on configuration)
- Hansen Threaded Cap 25mm
- Manifold Nipples
- 25mm Solenoid Valves
- Valve Box
Instructions
Before building the manifold, you should have a water supply line installed which is capable to support constant mains pressure. Whether having used PVC or High Density Poly, at the point where you wish to install your manifold, connect a fitting with a 25mm BSP male thread.
1. Pre-Installation
Lay out manifold fittings how they will be assembled. Dig a hole according to size of manifold and valve box. The water supply pipe should be set at a height for comfortable installation of valves inside the valve box.
2. Screw On Manifold
Screw on manifold fittings to your water supply until hand tight, attaching to the 25mm BSP Male thread mentioned above. By connecting with the swivel headed female side first, you’ll easily be able to connect them without having to rotate the whole fitting.
3. Cap Off End
If an exposed male thread is left (eg: from a tee or multi-port fitting), install the 25mm Cap.
4. Screw Nipples to Valves
Screw Manifold Nipples into your Solenoid Valves first, hand tight, then screw exposed female outlets to your Solenoid Valves.
5. Connect Valves to Manifold
One at a time, line up each Valve with attached Manifold Nipple & screw on with the Female Manifold Swivel.
6. Final Hand Tighten
Hand tighten each manifold connection one more time. Note: Don’t over tighten joins as they may crack or seals be compromised. Also, if there’s an O-Ring in the connection, no teflon!
7. Install Valve Box
Place Valve Box over manifold & fill in surrounding hole. If cut outs need to be made in the side of the box to allow pipe access, that is very much accepted practise.


